1. 소개
이 짧은 사용방법(예제)에서는 API를 호출할 때 JSON 웹 토큰(JWT)을 포함하도록 Swagger UI를 구성하는 방법을 볼 것입니다.
2. 메이븐 의존성
이 예에서는 Swagger 및 Swagger UI 작업을 시작하는 데 필요한 모든 의존성을 포함 하는 springfox-boot-starter를 사용 합니다. pom.xml 파일에 추가해 보겠습니다 .
<dependency>
    <groupId>org.springframework.boot</groupId>
    <artifactId>spring-boot-starter-web</artifactId>
</dependency>
<dependency>
    <groupId>io.springfox</groupId>
    <artifactId>springfox-boot-starter</artifactId>
    <version>3.0.0</version>
</dependency>
3. 스웨거 구성
먼저 JWT를 인증 헤더로 포함하도록 ApiKey 를 정의해야 합니다 .
private ApiKey apiKey() {
    return new ApiKey("JWT", "Authorization", "header");
}
다음 으로 전역 AuthorizationScope를 사용하여 JWT SecurityContext 를 구성해 보겠습니다 .
private SecurityContext securityContext() {
    return SecurityContext.builder().securityReferences(defaultAuth()).build();
}

private List<SecurityReference> defaultAuth() {
    AuthorizationScope authorizationScope = new AuthorizationScope("global", "accessEverything");
    AuthorizationScope[] authorizationScopes = new AuthorizationScope[1];
    authorizationScopes[0] = authorizationScope;
    return Arrays.asList(new SecurityReference("JWT", authorizationScopes));
}
그런 다음 API 정보, Security 컨텍스트 및 Security 체계를 포함 하도록 API Docket bean을 구성합니다.
@Bean
public Docket api() {
    return new Docket(DocumentationType.SWAGGER_2)
      .apiInfo(apiInfo())
      .securityContexts(Arrays.asList(securityContext()))
      .securitySchemes(Arrays.asList(apiKey()))
      .select()
      .apis(RequestHandlerSelectors.any())
      .paths(PathSelectors.any())
      .build();
}
private ApiInfo apiInfo() {
    return new ApiInfo(
      "My REST API",
      "Some custom description of API.",
      "1.0",
      "Terms of service",
      new Contact("Sallo Szrajbman", "www.baeldung.com", "salloszraj@gmail.com"),
      "License of API",
      "API license URL",
      Collections.emptyList());
}
4. REST 컨트롤러
우리에 ClientsRestController ,의 간단한 쓸 수 getClients는 클라이언트의 List을 반환하는 엔드 포인트 :
@RestController(value = "/clients")
@Api( tags = "Clients")
public class ClientsRestController {

    @ApiOperation(value = "This method is used to get the clients.")
    @GetMapping
    public List<String> getClients() {
        return Arrays.asList("First Client", "Second Client");
    }
}
5. 스웨거 UI
이제 애플리케이션을 시작할 때 http://localhost:8080/swagger-ui/ URL 에서 Swagger UI에 액세스할 수 있습니다 .
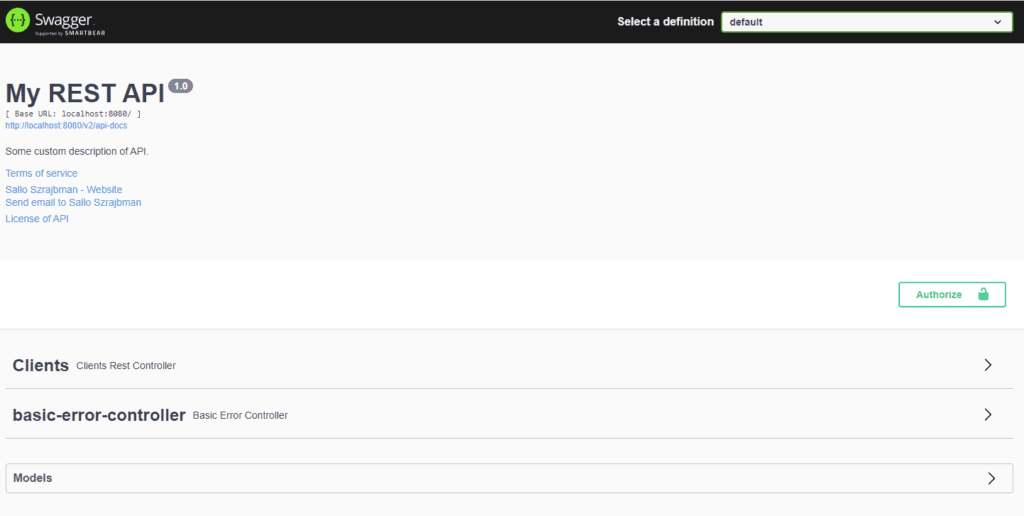
승인 버튼이 있는 Swagger UI는 다음과 같습니다 .

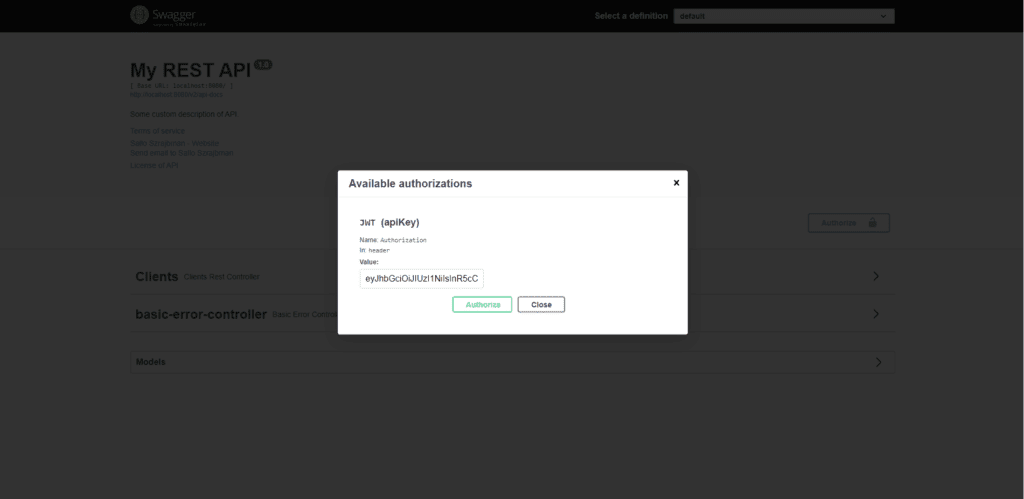
승인 버튼 을 클릭하면 Swagger UI에서 JWT를 요청합니다.
토큰을 입력하고 Authorize 를 클릭하기만 하면 API에 대한 모든 요청이 HTTP 헤더에 토큰을 자동으로 포함합니다.

6. JWT를 사용한 API 요청
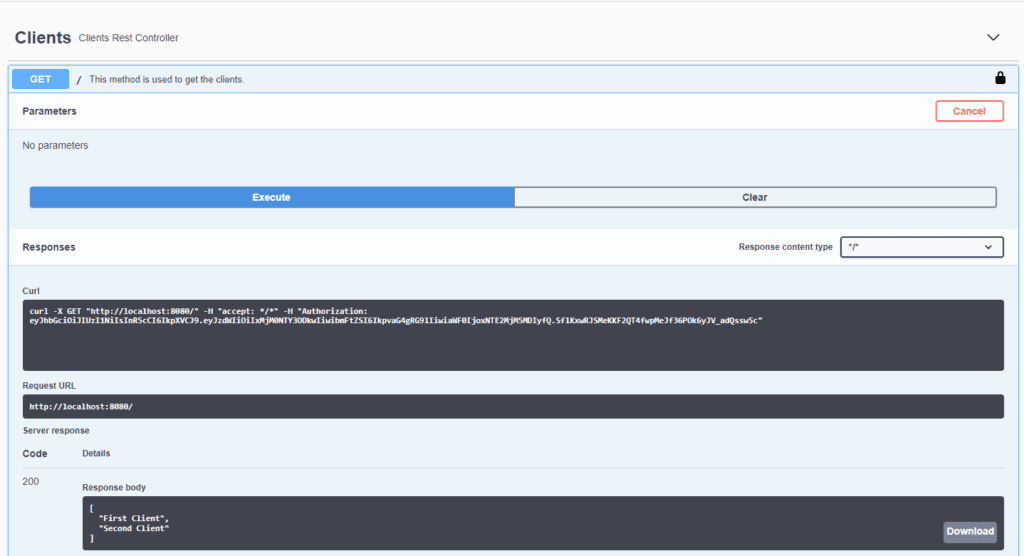
API에 요청을 보낼 때 토큰 값이 포함된 "Authorization" 헤더가 있음을 확인할 수 있습니다.

7. 결론
이 기사에서는 Swagger UI가 JWT를 설정하기 위해 사용자 정의 구성을 제공하는 방법을 살펴보았습니다. 이는 애플리케이션 인증을 처리할 때 도움이 될 수 있습니다. Swagger UI에서 권한을 부여하면 모든 요청에 JWT가 자동으로 포함됩니다.
이 기사의 소스 코드는 GitHub에서 사용할 수 있습니다 .

