1. 개요
이 예제에서는 Spring MVC 웹 애플리케이션에서 springdoc-openapi 라이브러리 를 사용하여 기본 글로벌 Security 체계를 구성하고 이를 API의 기본 Security 요구 사항으로 적용하는 방법을 알아봅니다 . 또한 이러한 기본 Security 요구 사항을 무시할 수 있는 방법에 대해 설명합니다.
OpenAPI 사양 을 사용하면 API에 대한 일련의 Security 체계를 정의할 수 있습니다 . API의 Security 요구 사항을 전역적으로 구성하거나 Endpoints별로 적용/제거할 수 있습니다.
2. 설정
Spring Boot를 사용하여 Maven 프로젝트를 빌드하고 있으므로 프로젝트 설정을 살펴보겠습니다. 이 섹션의 끝에는 간단한 웹 앱이 있습니다.
2.1. 의존성
예제에는 두 가지 의존성이 있습니다. 첫 번째 의존성은 spring-boot-starter-web 입니다. 이것은 웹 앱을 빌드하기 위한 주요 의존성입니다.
<dependency>
    <groupId>org.springframework.boot</groupId>
    <artifactId>spring-boot-starter-web</artifactId>
    <version>2.7.1</version>
</dependency>
다른 의존성은 HTML, JSON 또는 YAML에서 API 문서를 렌더링하는 라이브러리인 springdoc-openapi-ui 입니다.
<dependency>
    <groupId>org.springdoc</groupId>
    <artifactId>springdoc-openapi-ui</artifactId>
    <version>1.6.9</version>
</dependency>
2.2. 애플리케이션 진입점
의존성이 준비되면 애플리케이션의 진입점을 정의하겠습니다.
@SpringBootApplication 어노테이션을 사용 하여 앱을 부트스트랩 하고 SpringApplication 도우미 클래스를 사용하여 시작합니다 .
@SpringBootApplication
public class DefaultGlobalSecuritySchemeApplication {
    public static void main(String[] args) {
        SpringApplication.run(DefaultGlobalSecuritySchemeApplication.class, args);
    }
}
3. springdoc-openapi 기본 구성
Spring MVC가 구성되었으면 API 시맨틱 정보를 살펴보겠습니다.
DefaultGlobalSecuritySchemeApplication 클래스 에 springdoc-openapi 어노테이션을 추가하여 기본 글로벌 Security 체계와 API 메타데이터를 정의합니다 . 전역 Security 체계를 정의하기 위해 @SecurityScheme 어노테이션을 사용합니다.
@SecurityScheme(type = SecuritySchemeType.APIKEY, name = "api_key", in = SecuritySchemeIn.HEADER)APIKEY Security 체계 유형을 선택 했지만 JWT 와 같은 다른 Security 체계를 구성할 수 있습니다 . Security 체계를 정의한 후 메타데이터를 추가하고 API에 대한 기본 Security 요구 사항을 설정합니다. @OpenApiDefinition 어노테이션 을 사용하여 이를 수행합니다 .
@OpenAPIDefinition(info = @Info(title = "Apply Default Global SecurityScheme in springdoc-openapi", version = "1.0.0"), security = { @SecurityRequirement(name = "api_key") })여기에서 info 속성은 API 메타데이터를 정의합니다 . 또한 Security 속성은 기본 전역 Security 요구 사항을 결정합니다 .
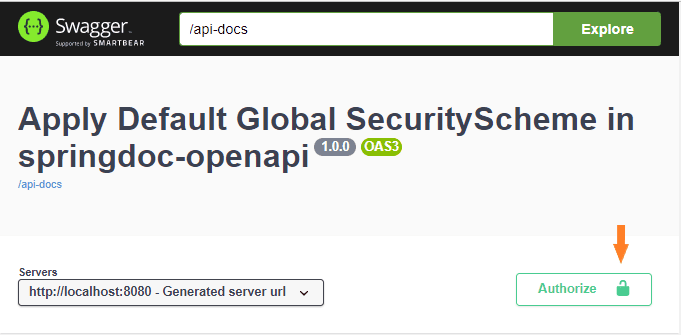
어노테이션이 있는 HTML 문서가 어떻게 보이는지 봅시다. 전체 API에 적용되는 메타데이터와 Security 버튼이 표시됩니다.

4. 컨트롤러
이제 Spring 프레임워크와 springdoc-openapi 라이브러리를 구성했으므로 컨텍스트 기본 경로에 하나의 REST 컨트롤러를 추가해 보겠습니다 . 이를 달성하기 위해 @RestController 및 @RequestMapping 어노테이션을 사용합니다.
@RestController
@RequestMapping("/")
public class DefaultGlobalSecuritySchemeOpenApiController {
    ...
}
그런 다음 두 개의 Endpoints 또는 경로 를 정의합니다 .
첫 번째 엔드포인트는 /login 엔드포인트입니다. 사용자 자격 증명을 받고 사용자를 인증합니다. 인증에 성공하면 Endpoints이 토큰을 반환합니다.
API의 다른 Endpoints은 /ping Endpoints이며 /login 메서드 에서 생성된 토큰이 필요합니다 . 요청을 수행하기 전에 메서드는 토큰의 유효성을 검사하고 사용자에게 권한이 있는지 확인합니다.
요약 하면 /login 엔드포인트는 사용자를 인증하고 토큰을 제공합니다. /ping Endpoints 은 /login Endpoints 에서 반환된 토큰을 수신하고 그것이 유효하고 사용자가 작업을 수행할 수 있는지 확인합니다 .
4.1. login() 메서드
이 방법에는 Security 요구 사항이 없습니다. 따라서 기본 Security 요구 사항 구성을 재정의해야 합니다 .
우선, 이것이 API의 Endpoints임을 Spring에 알려야 하므로 @RequestMapping 어노테이션을 추가 하여 Endpoints을 구성합니다.
@RequestMapping(method = RequestMethod.POST, value = "/login", produces = { "application/json" }, consumes = { "application/json" })그런 다음 엔드포인트에 시맨틱 정보를 추가해야 합니다. 따라서 @Operation 및 @SecurityRequirements 어노테이션을 사용합니다. @Operation 은 Endpoints을 정의하고 @SecurityRequirements 는 Endpoints에 적용되는 특정 Security 요구 사항 집합을 정의합니다.
@Operation(operationId = "login", responses = {
    @ApiResponse(responseCode = "200", description = "api_key to be used in the secured-ping endpoint", content = { @Content(mediaType = "application/json", schema = @Schema(implementation = TokenDto.class)) }),
    @ApiResponse(responseCode = "401", description = "Unauthorized request", content = { @Content(mediaType = "application/json", schema = @Schema(implementation = ApplicationExceptionDto.class)) }) })
@SecurityRequirements()
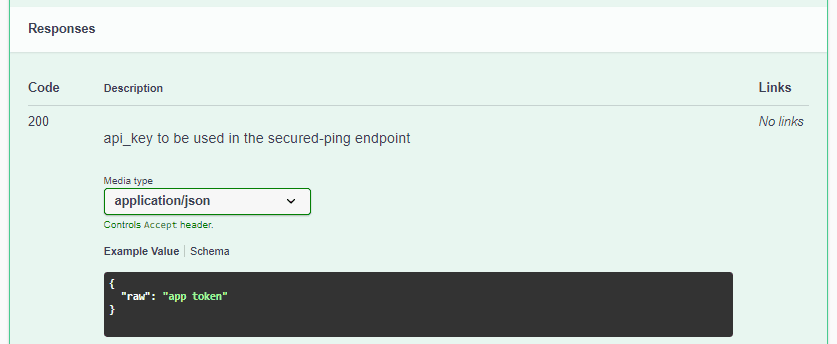
예를 들어 상태 코드가 200인 응답에 대한 HTML 문서는 다음과 같습니다.

마지막으로 login() 메서드의 서명 을 살펴보겠습니다 .
public ResponseEntity login(@Parameter(name = "LoginDto", description = "Login") @Valid @RequestBody(required = true) LoginDto loginDto) {
    ...
}
보시다시피 API 요청 본문은 LoginDto 인스턴스를 받습니다. 또한 문서에 정보를 표시하기 위해 의미론적 정보로 DTO를 장식해야 합니다.
public class LoginDto {
    private String user;
    private String pass;

    ...

    @Schema(name = "user", required = true)
    public String getUser() {
        return user;
    }

    @Schema(name = "pass", required = true)
    public String getPass() {
        return pass;
    }
}
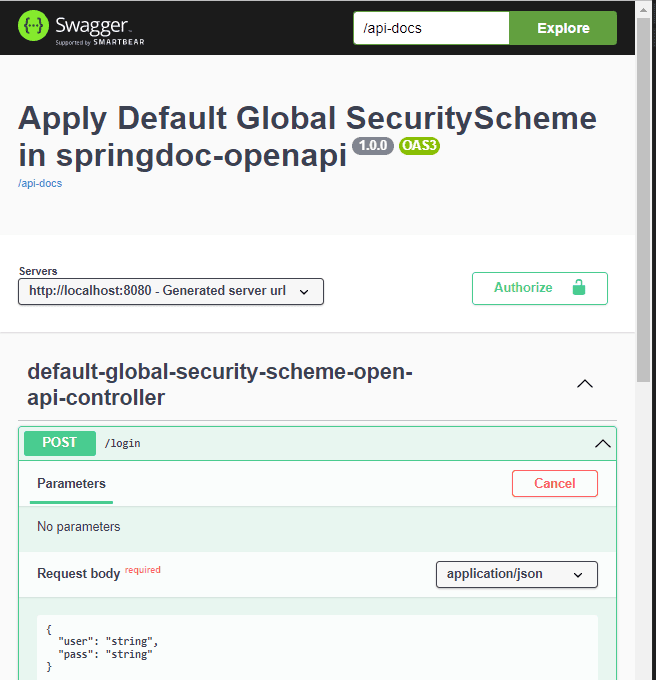
여기에서 /login endpoint HTML 문서가 어떻게 보이는지 확인할 수 있습니다.

4.2. ping() 메서드
이 시점에서 ping() 메서드를 정의합니다. ping() 메서드 는 기본 글로벌 Security 체계를 사용합니다 .
@Operation(operationId = "ping", responses = {
    @ApiResponse(responseCode = "200", description = "Ping that needs an api_key attribute in the header", content = {
        @Content(mediaType = "application/json", schema = @Schema(implementation = PingResponseDto.class), examples = { @ExampleObject(value = "{ pong: '2022-06-17T18:30:33.465+02:00' }") }) }),
    @ApiResponse(responseCode = "401", description = "Unauthorized request", content = { @Content(mediaType = "application/json", schema = @Schema(implementation = ApplicationExceptionDto.class)) }),
    @ApiResponse(responseCode = "403", description = "Forbidden request", content = { @Content(mediaType = "application/json", schema = @Schema(implementation = ApplicationExceptionDto.class)) }) })
@RequestMapping(method = RequestMethod.GET, value = "/ping", produces = { "application/json" })
public ResponseEntity ping(@RequestHeader(name = "api_key", required = false) String api_key) {
    ...
}
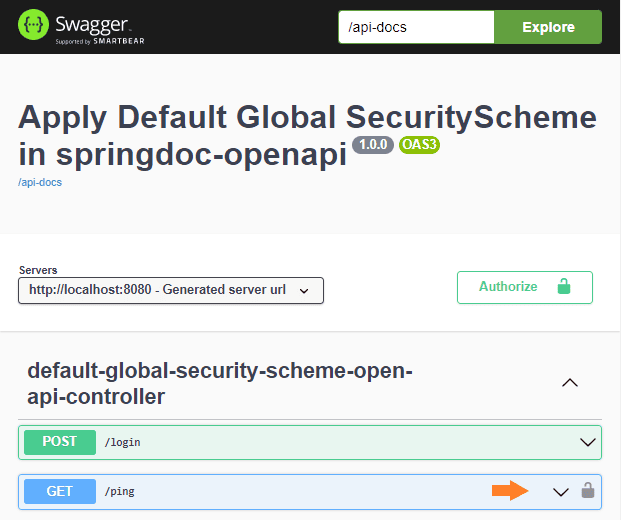
login( ) 메소드 와 ping() 메소드 의 주요 차이점은 적용될 Security 요구사항에 있습니다. login() 에는 Security 요구 사항이 전혀 없지만 ping() 메서드에는 API 수준에서 정의된 Security이 있습니다. 따라서 HTML 문서는 /ping Endpoints 에 대해서만 잠금을 표시하는 상황을 나타냅니다 .

5. REST API 문서 URL
이제 Spring MVC 웹 앱이 준비되었으며 서버를 시작할 수 있습니다.
mvn spring-boot:run -Dstart-class="com.baeldung.defaultglobalsecurityscheme.DefaultGlobalSecuritySchemeApplication"서버가 준비되면 앞의 예에서와 같이 http://localhost:8080/swagger-ui-custom.html URL에서 HTML 문서를 볼 수 있습니다.
API 정의의 JSON 버전은 http://localhost:8080/api-docs 에 있고 YAML 버전은 http://localhost:8080/api-docs.yaml에 있습니다.
이러한 출력은 swagger-codegen-maven-plugin 을 사용하여 다른 언어로 API의 클라이언트 또는 서버를 구축 하는 데 사용할 수 있습니다 .
6. 결론
이 기사에서는 springdoc-openapi 라이브러리를 사용하여 기본 글로벌 Security 체계를 정의하는 방법을 배웠습니다. 또한 API에 대한 기본 Security 요구 사항으로 적용하는 방법도 살펴보았습니다. 또한 특정 Endpoints에 대한 기본 Security 요구 사항을 변경하는 방법을 배웠습니다.
우리가 발견한 또 다른 사실은 springdoc-openapi 의 JSON 및 YAML 출력을 사용하여 코드 생성을 자동화할 수 있다는 것 입니다.
늘 그렇듯이 이 기사의 전체 소스 코드는 GitHub 에서 사용할 수 있습니다 .

